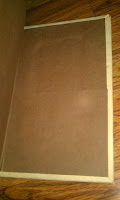
This particular project is to create a memorial accordion book with pockets for note or cards to your baby. The example I made is for Alexander's first birthday that just passed. We asked friends and family to write brief notes to Alexander or to us explaining what his short life on earth has taught them. I wanted to create something to hold all these letters and so I turned to my ever expanding knowledge as a book-maker and this is what I came up with:
Materials you will need are (most materials will need to be cut to the proper sizes):
- Paper Glue (My favorite is PVA)
- a brush to apply the glue
- ribbon
- decorative paper, stickers, etc to decorate the cover
- Scrap paper, an old magazine, or junk mail
- two 8 1/2" x 5 1/2" pieces of sturdy cardboard or mat-board (not corrugated, cutting up the backing of a sketchbook works really well)
- two 8 1/2" x 11"pieces of decorative paper (This is your main cover paper, I used scrap-booking paper)
- two 20" x 12 1/2" pieces of heavy drawing paper for the pages (I used brown craft paper, but white paper works just as well)
- one 1 1/2"x 12 1/2" piece of heavy drawing paper (I used a scrap from what I had leftover after cutting the other paper)
Step 1: Making the Cover
Brush glue over one entire side of the sturdy cardboard
Place the cardboard glue side down in the middle of the wrong side of the decorative paper
Press it down so the paper is nice and smooth
Fold the corners of the paper toward the center and trim them off
Use those corners and glue them to the corners of the board, this will make the next step look even neater
Fold and glue the remaining tabs down, making sure they are nice and smooth. This is what your finished cover board should look like:
Repeat with the other piece of cardboard and decorative paper, so you have two cover boards
Step 2: Folding the pages
Fold 4 inches of the heavy drawing paper up (This will make your pockets)
Fold your paper in half and then fold the ends back towards the center crease
This should give you an accordion like the picture below
Repeat with the second piece of heavy drawing paper
Step 3: Connecting the Pages
fold 4 inches of the 1 1/2" piece of paper up
then fold it in half
Unfold it and apply glue to just the 4 inch section, carefully place this connector paper on the 4 inch flap of fist one set of pages and then the other.
Flip the whole set of pages and connector over
apply glue to the rest of the connector and fold it over the pages
The connector should fold where the pages meet, so you get a long accordion (pictured bellow)
Feel free to make and connect more sets of pages if you need a bigger book.
Step 4: Attaching the Cover
Fold up the accordion pages so the pockets are on the inside
Place a piece of scrap paper between one end and the rest of the pages
Paint glue on the entire back of the end
Carefully center the glued page over one of your cover boards and smooth it out (This will cover the cardboard that still shows)
Repeat the process on the other end of the pages with the other cover board
At this point you have a blank accordion book with pockets, feel free to decorate it as you choose. I used this idea from pintereast to make the paper daffodil.
I glued ribbons to the back cover board, so I am able to tie my book closed. After you are done decorating your book fill the pockets with notes and cards to your baby. You could have your smaller children draw pictures to be placed in the pockets. I had to place some of the larger cards on the ends so they could stick out, because they wouldn't quite fit in the pockets.
Feel free to decorate the inside of your book, including the back of the pages. I plan to glue photos from Alexander's birthday party and write out the Random Acts of Kindness that were preformed in his memory on the back of this one.
Feel free to leave questions in the comments section. Let me know if you decide to make your own accordion book. I'd love to see your finished pieces.


No comments:
Post a Comment